Okay, this is a big one.

Normally when looking at buildings for wargaming, the focus is on making the outside look great. The inside becomes a second thought. However, TTCombat’s latest release is a visual treat both inside and out. It’s also ridiculously huge.
The Distribution depot is designed to be a centrepiece of a game, allowing gamers to play both inside and out, fighting through the cargo bays and across gantries. As an airsofter, it already feels like some of the urban sites I’ve played through. It’s on the more premium side of TTCombat’s releases and it’s obvious a lot of design went into it
Before I get into the impressions, you may have noticed (if you follow my Facebook page) I had an issue with the baseboard for the depot. However, within a day of telling the folks at TTCombat I had new one in my hands. Interestingly, the broken original arrived as a single piece while the replacement was in two pieces like the baseboard for the extension. I’m not sure how this happened and it’s quite possible I got something that missed QC. However, big positive on customer support.
Additionally, I haven’t got round to adding all of the cardboard detailing panels to hide the joins so excuse them missing from the photos below.
Common Parts
So the first thing I advise before building the depot is to read through all the instructions for the various bits you may have picked up. There are quite a few ways to assemble them, depending on if you want the office connected to the rest of the depot or separate, or if you want to use one or more extension kits.
As with all MDF kits – YOU NEED TO DRY FIT EVERYTHING. This is the biggest and most complex MDF kit I’ve seen (ignoring the truly gigantic galaxy building) and so there are lots of places where it can go horribly wrong. I really recommend not rushing it and taking your time as you assemble it.
Across all the buildings, the construction is primarily MDF with cardboard detailing panels. The most common use for the cardboard is covering up the various places where the MDF slots together and bridging the gaps in the roof. I think this is a very clever use of the materials but as a final step it is a little bit laborious as you slowly but surely add the straight pieces after having just assembled an entire thing. Both the MDF and Cardboard are quite securely on their sprues, require them to be cut away rather than simply “popped out”.
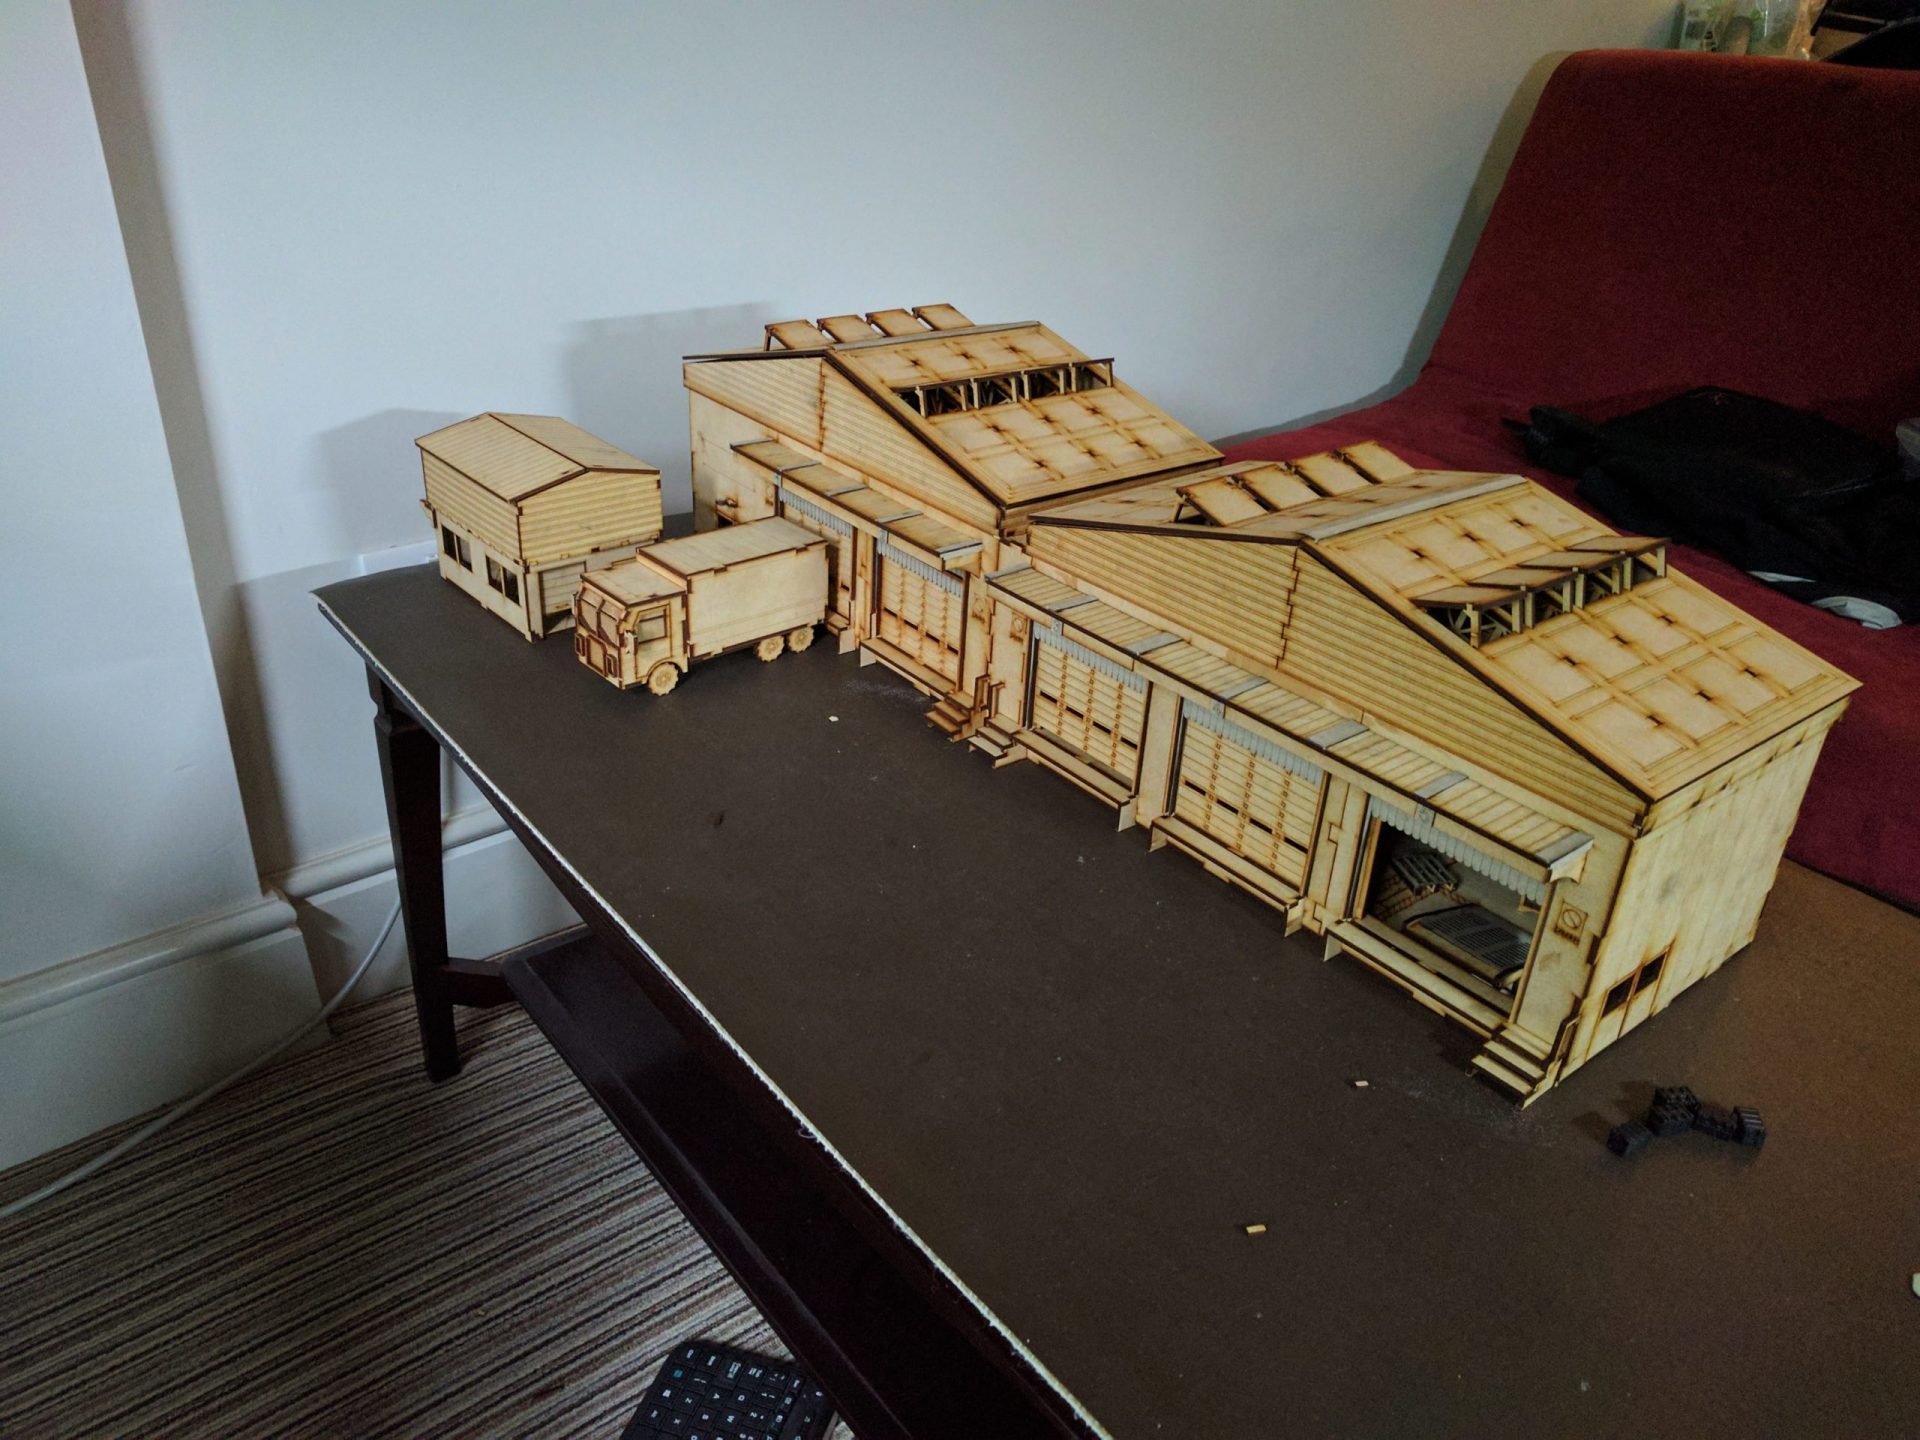
The Depot
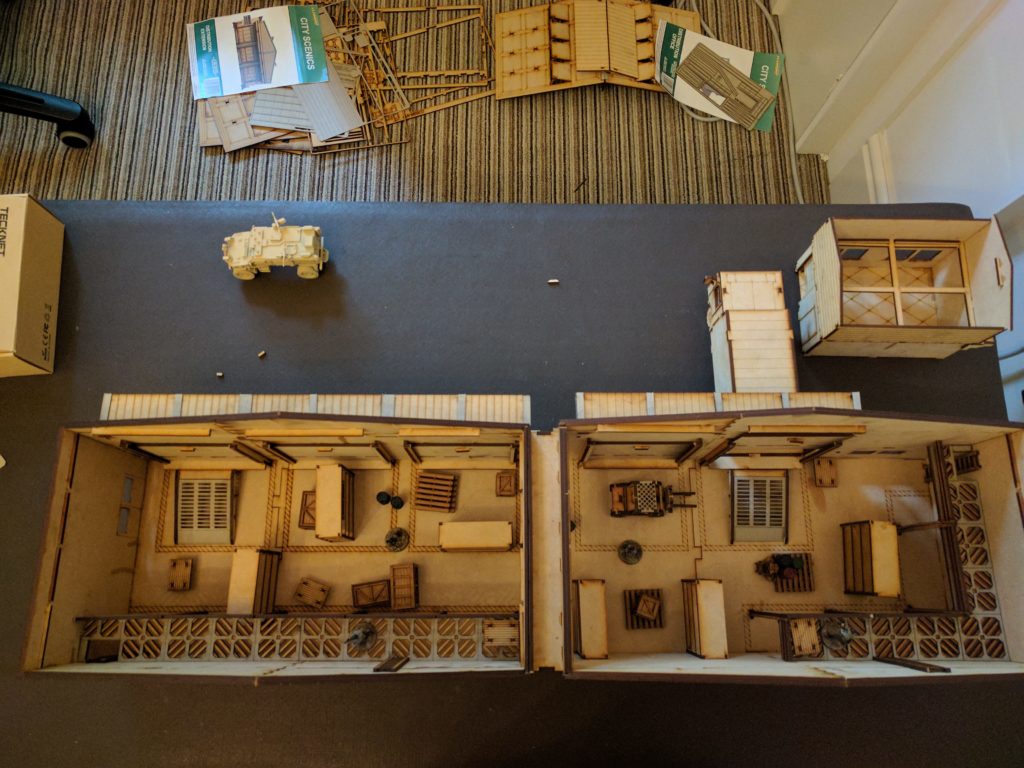
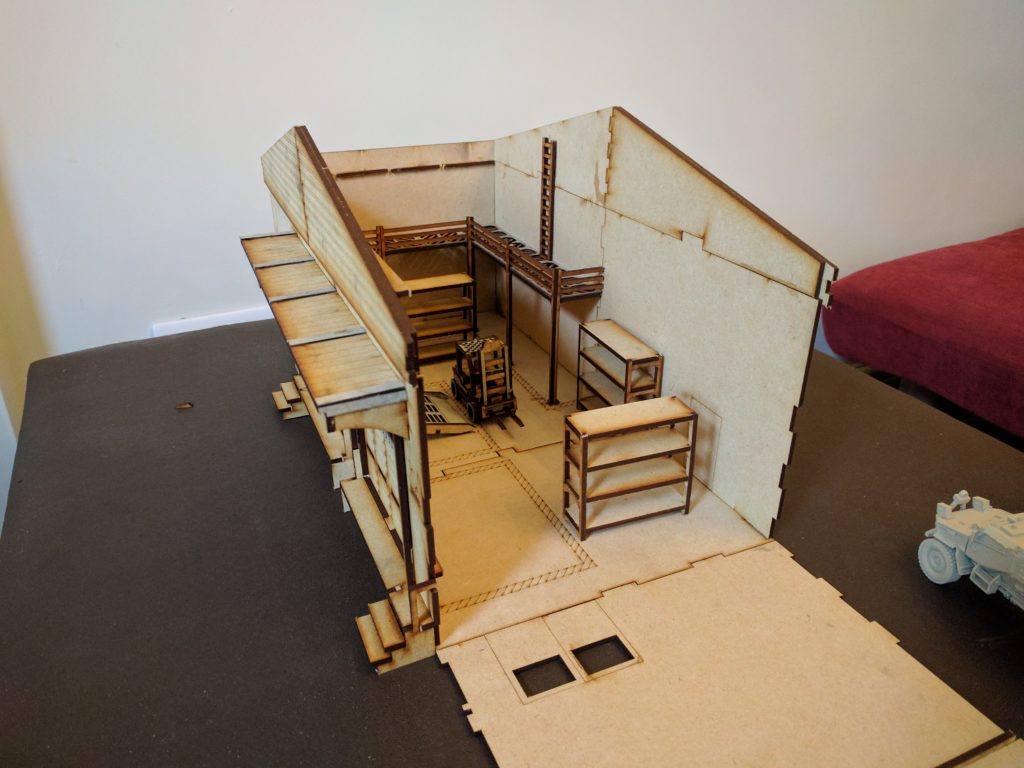
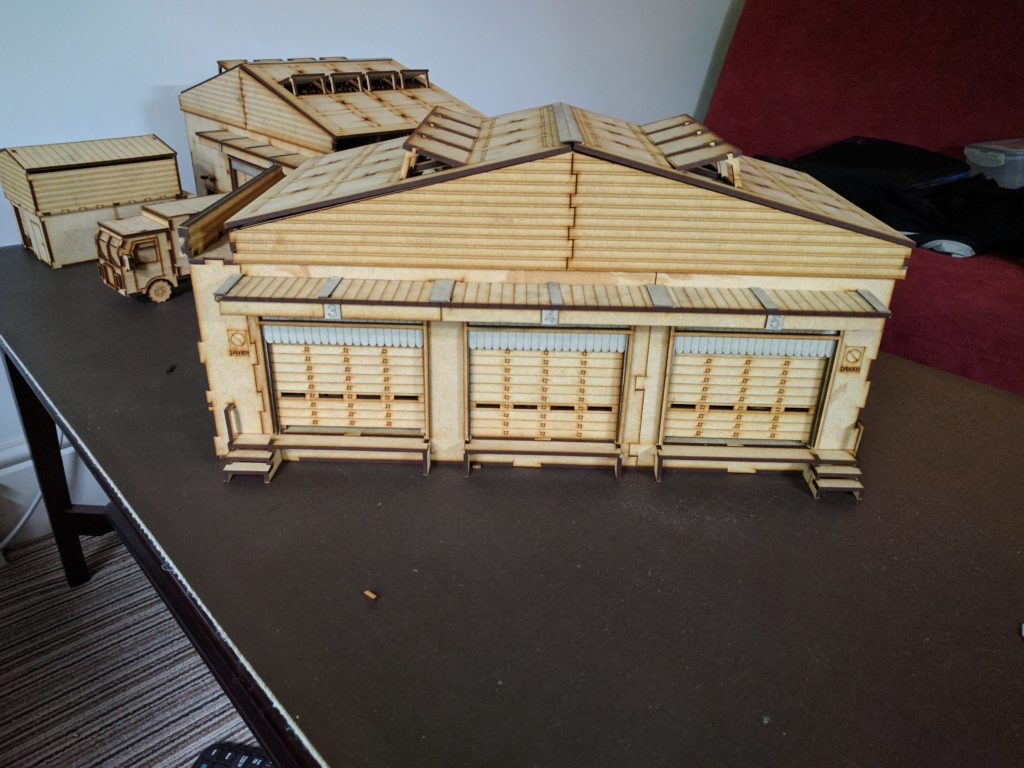
The depot is the key to the entire setup – there is no reason to purchase the other two kits without first getting this one. By default the depot has two cargo bays and a double entry door at the front. There are also two other exit doors, one at the rear and one in an end wall. The internal area is about 40cm x 20cm.
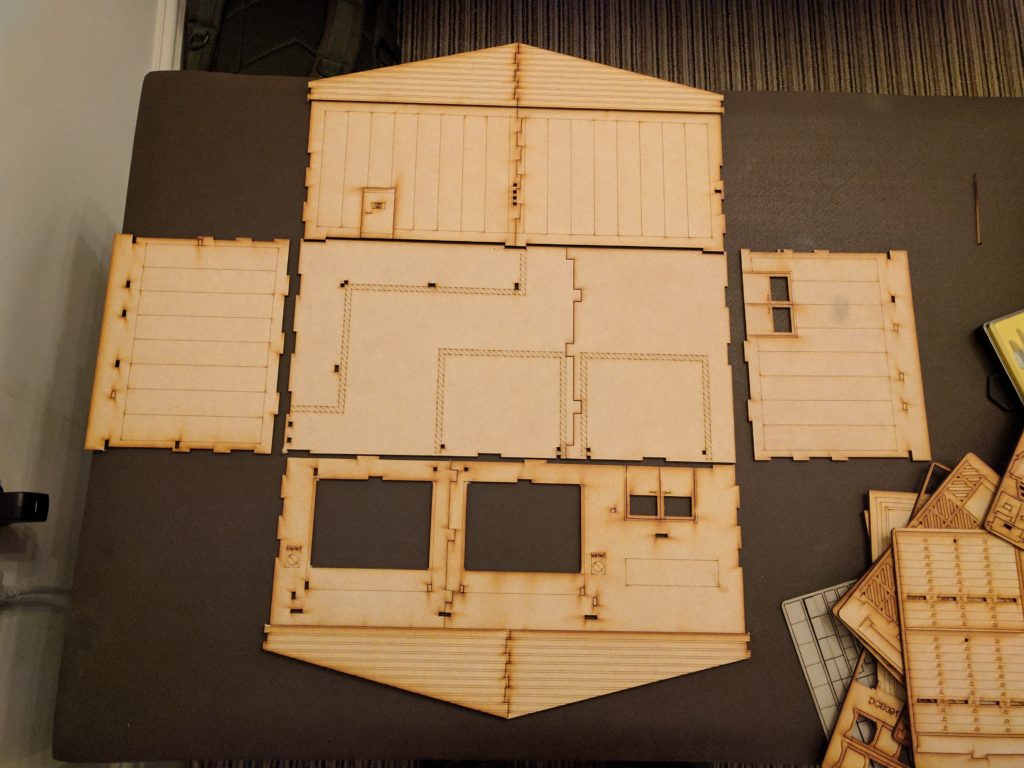
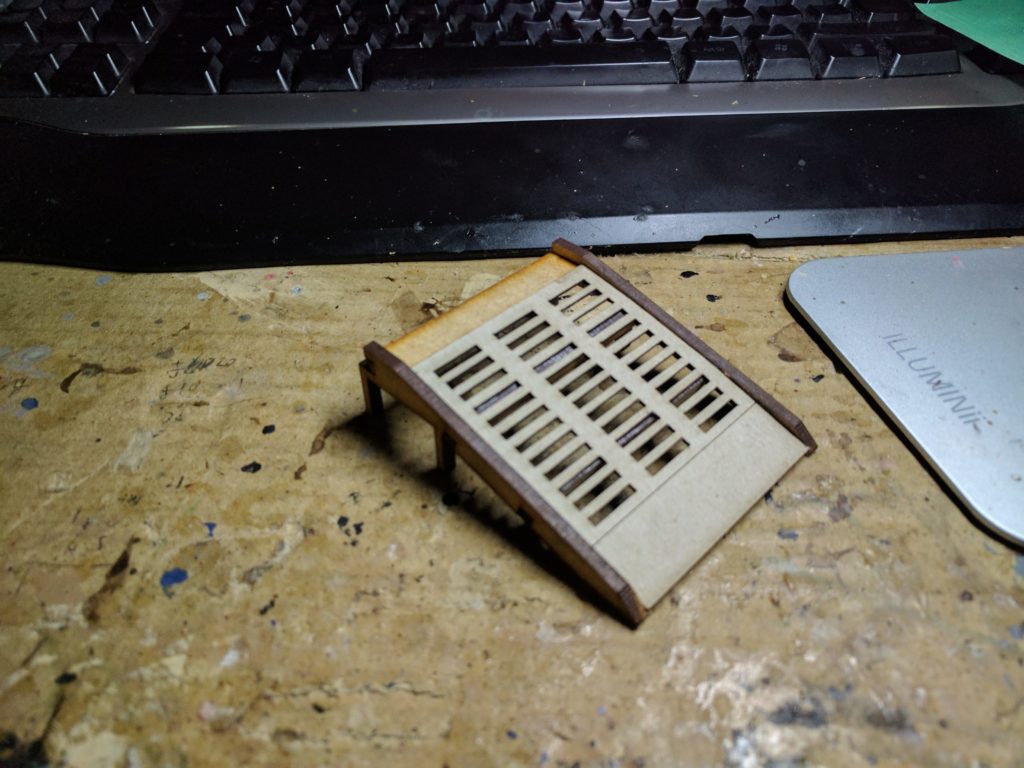
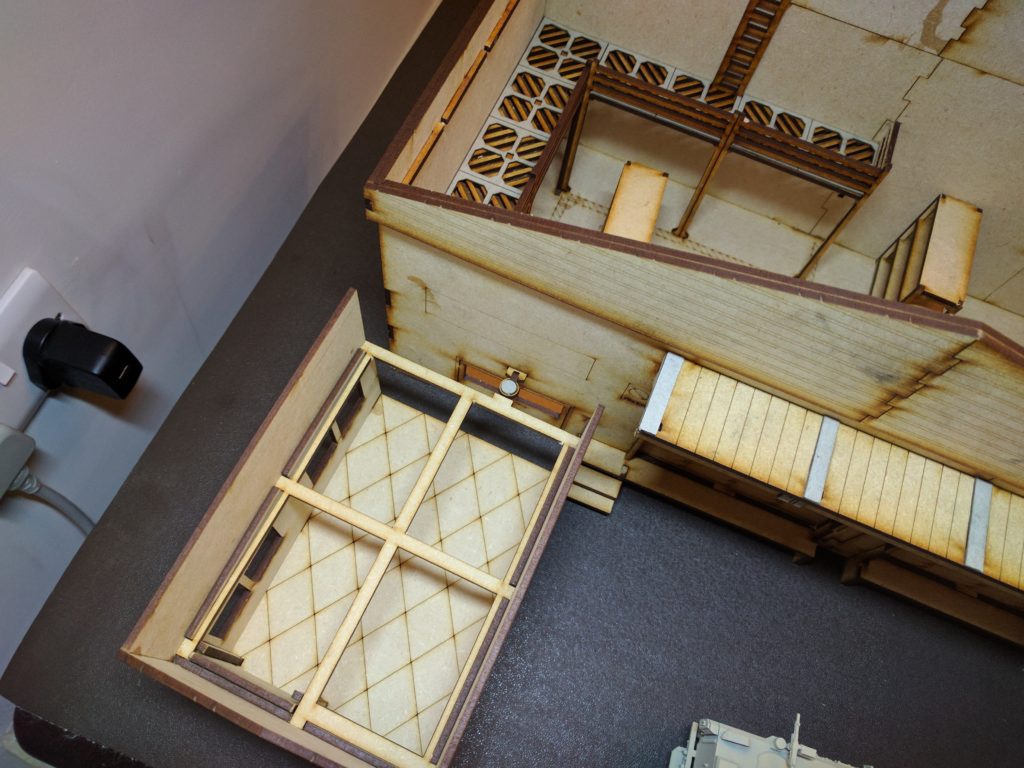
As you can see while building, the basic structure is a two piece baseboard, two single part end pieces, and two long pieces made of triangular roof pieces added to wall pieces. These form the key structure with each clipping into the other and providing a good framework. From here, you start adding additional elements, fitting the sliding shutters (moveable in their rail container), adding the front loading steps before adding the shade over the bays. This shade shows off using cardboard to cover joins as well as the numbers that mark out which bay is which.
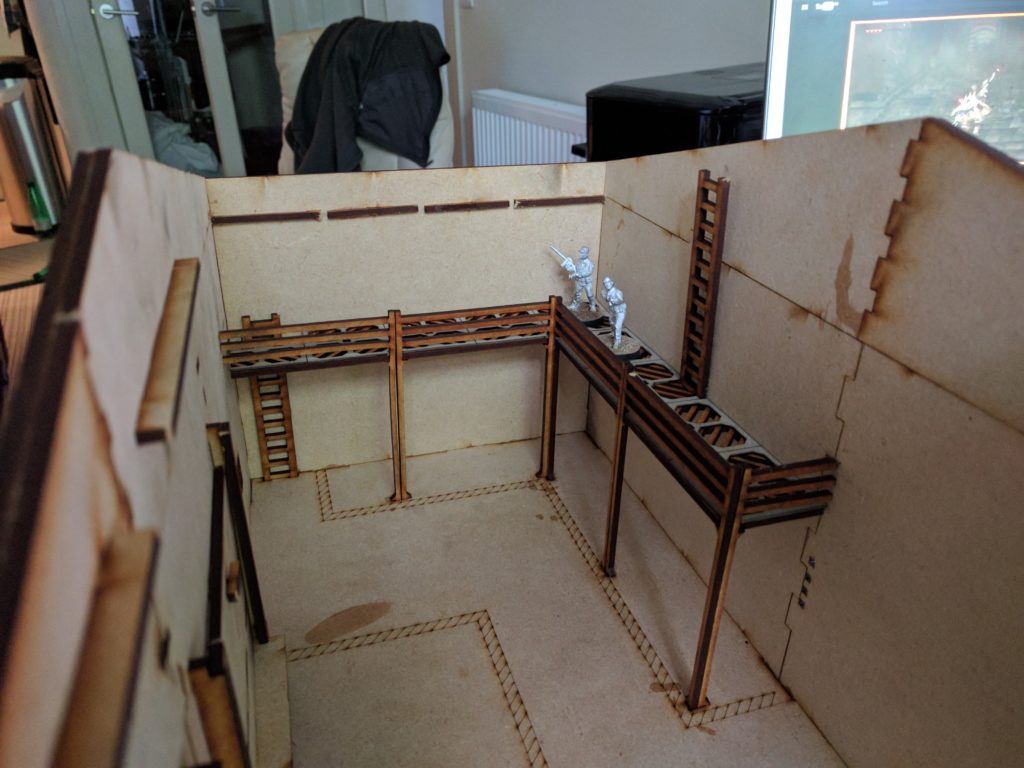
Inside, most of the floor space is left open but there is a gantry level. It sits quite high off the floor level, easily letting you fill the ground floor with containers and more. The gantry is assembled from MDF base pieces with a layer of cardboard on top. Both pieces are expertly cut out, making it easy to fit them together and allow additional elements such as ladders to be put into place. Around the gantry are is a railing, that holds the gantry’s surface up. The gantry also include another ladder heading to the roof.
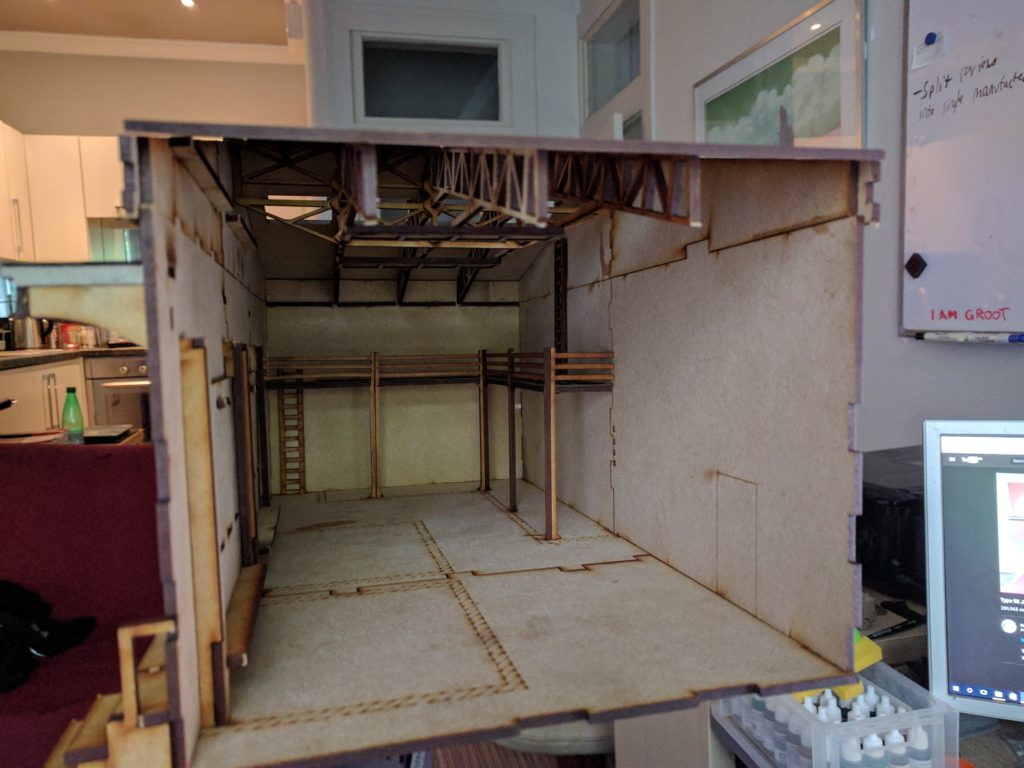
As you would expect, the roof is removable to let you access the interior. The roof has some nice details such as fluorescent lights and open panels. More importantly for something you’ll be moving on and off, they feel really solid. I don’t feel concerned about putting them down while playing.
For all the great parts of this kit, there are one or two little issues. I think the instructions are useful but there are lots of places where it took a while to work out exactly what is going on. There are also some strange issues with parts. I seemed to be missing parts of the stairs; instead having shorter stair props, I instead had duplicates of the stair with banister. This was easily fixed, requiring a quick snip to prevent them covering up the front entrances but was a little unexpected. In addition, there is a set of four holes in the backboard which look like somewhere you would normally attach the banisters to but are not used. Finally, as with other TTCombat kits there were one or two places I had to trim a part or two, most notably on the banisters where they connect to the front wall. Another reason to test with dry fits.
But wait there is more! The depot also comes with some additional bits to help fill the large interior.
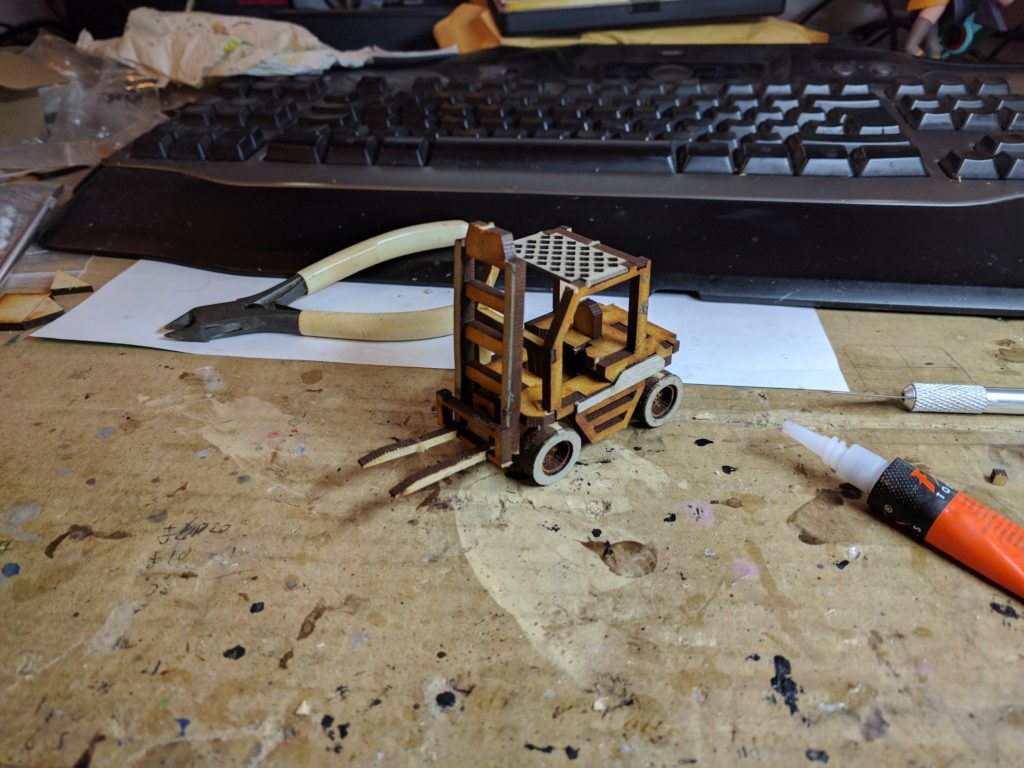
I really like the fork lift included in the set. It’s just about the right height for my 28mm figures and is packed full of character. There is a slight downside in that they only really work well carrying the TTCombat pallets – anything heavier on the forklift just tips over. Even so, just look at it!
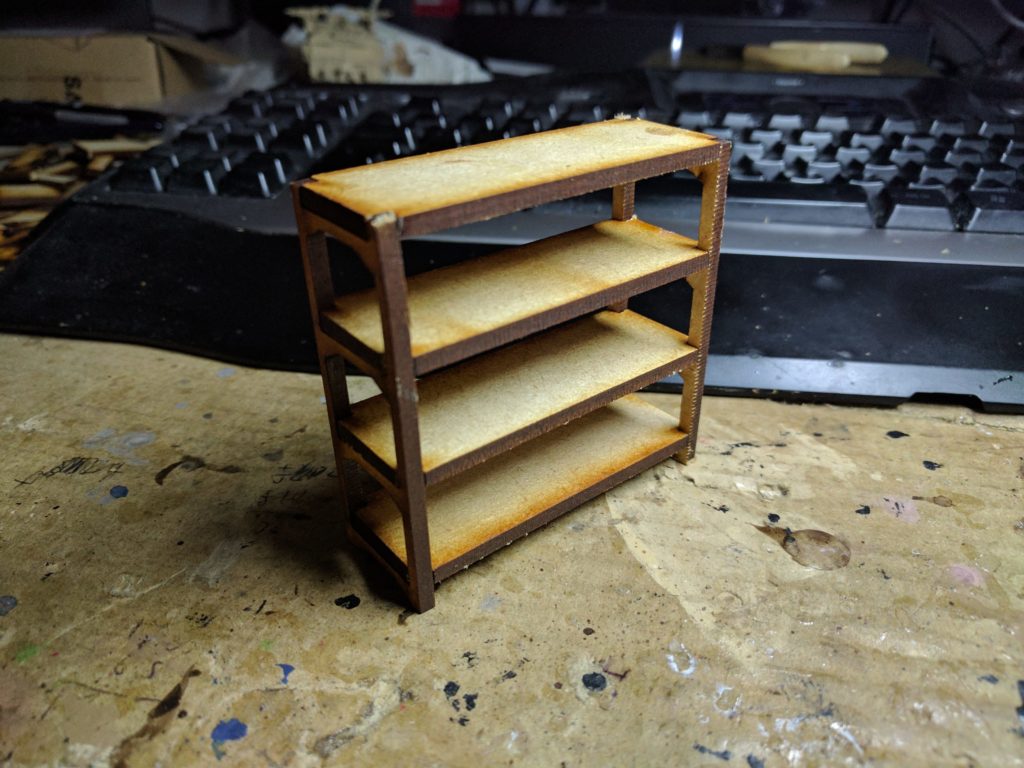
The depot also includes three shelving sets. These are really cool and help to fill the interior without blocking all the lines of sight. The gap between the shelving is perfect sized for the various crates you may buy, including a large pack offered by TTCombat.
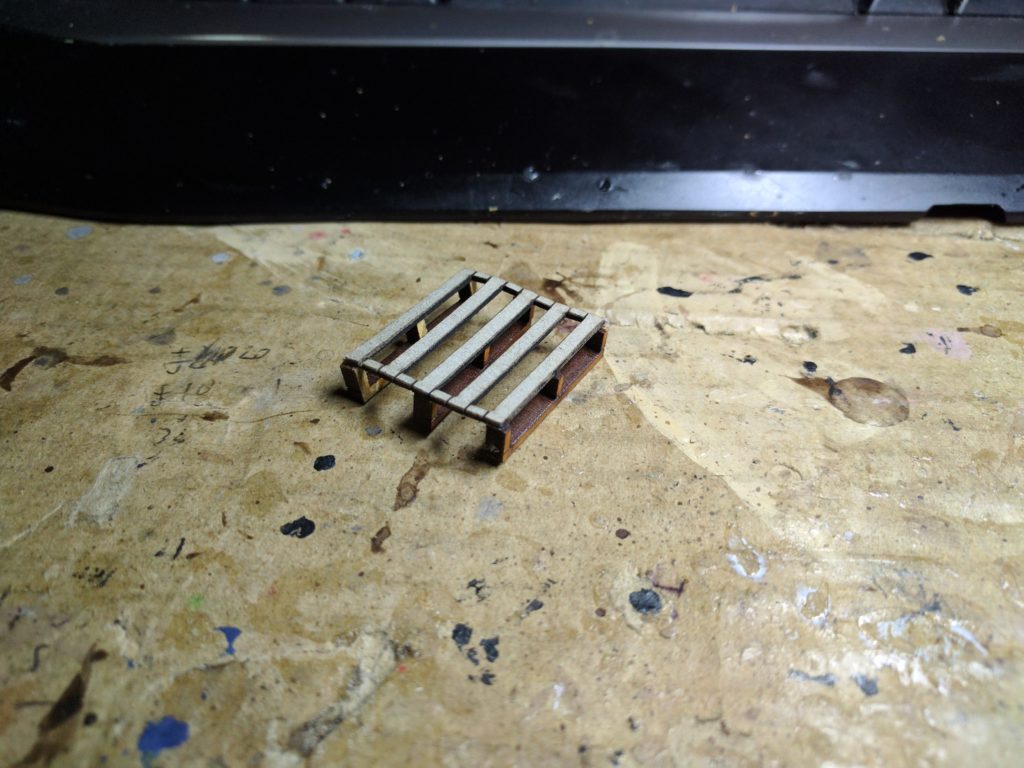
I’m less excited about pallets. After having assembled the entirely MDF Knights of Dice ones, these are just disappointing. Rather than made out of just wood, they are instead combinations of MDF “legs” and a cardboard top. Having made a few of them, I have little faith in them maintaining their structure as they seem to flex a lot..
More exciting is the ramp that lets you wheel things up to the level of the front doors. MDF side pieces hold up a cardboard surface. It looks very cool. The only downside? It would have been nice to have a second one to allow for one to be placed on either side so vehicles could drive in and out of the depot or have them lined up at both bays.
The Extension Kit
Okay so the depot is big. But what if you need it to be EVEN bigger?
Fundamentally, the extension kit is another set of front and back walls with a slightly different layout and a method of attaching to the original building. The kit does require you to use the end wall from the Depot meaning you can’t easily switch between a single depot building and one that is extended. The new layout moves the gantry into going only along the back wall and increases the number of bays from two to three. Everything else, from initial frame to assembling the roof is made using the same techniques as the main building.
As with the depot, the extension kit also includes three shelving units, a ramp and a pile of pallets. These are the same as the main depot so check above for my impressions.
Finally, after looking over the plans (and realising how far the detailing numbers go), it looks like you could easily extend the depot to have even more bays simply by adding another extension kit in between the original depot and the kit you have assembled with the end wall. It’s a cool idea, but seeing as the depot + extension is almost 3ft in length, you will need a giant board.
The Office
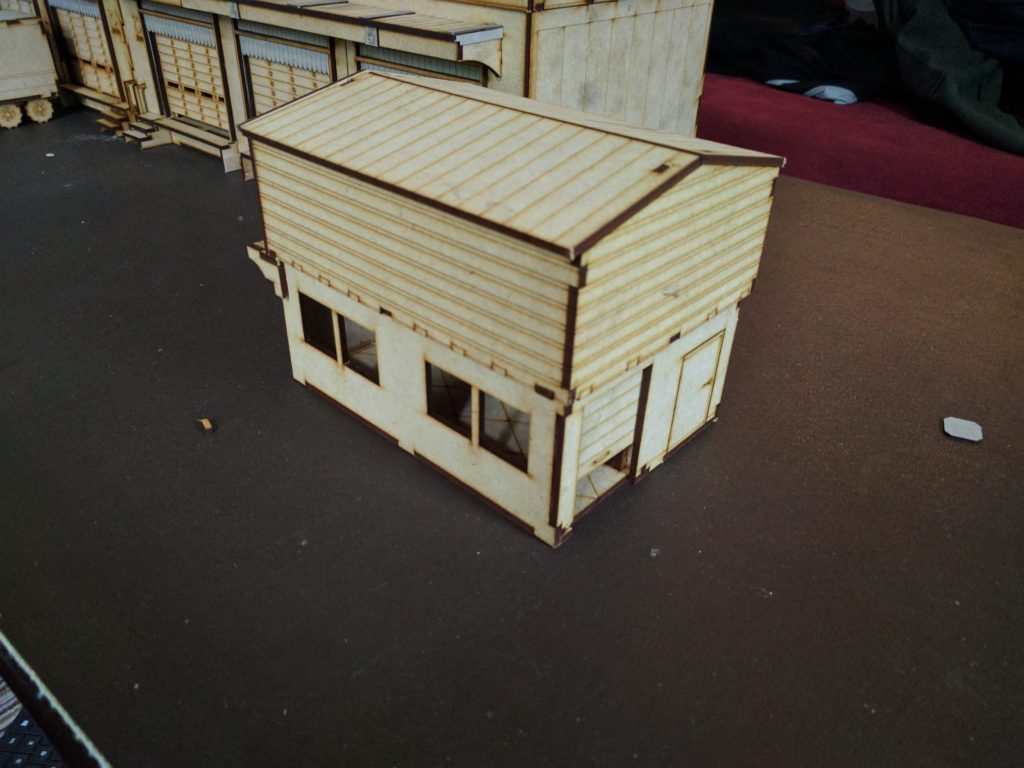
Going from the huge buildings in the rest of the series, the office is a bit of a step down. Designed to give you somewhere for the security guards to hang out, the office is two storeys high but only has a ground floor. The building also has a normal door and a vertical moving slide door. The roof is also removable. On the other hand, the office does not include any interior furniture.
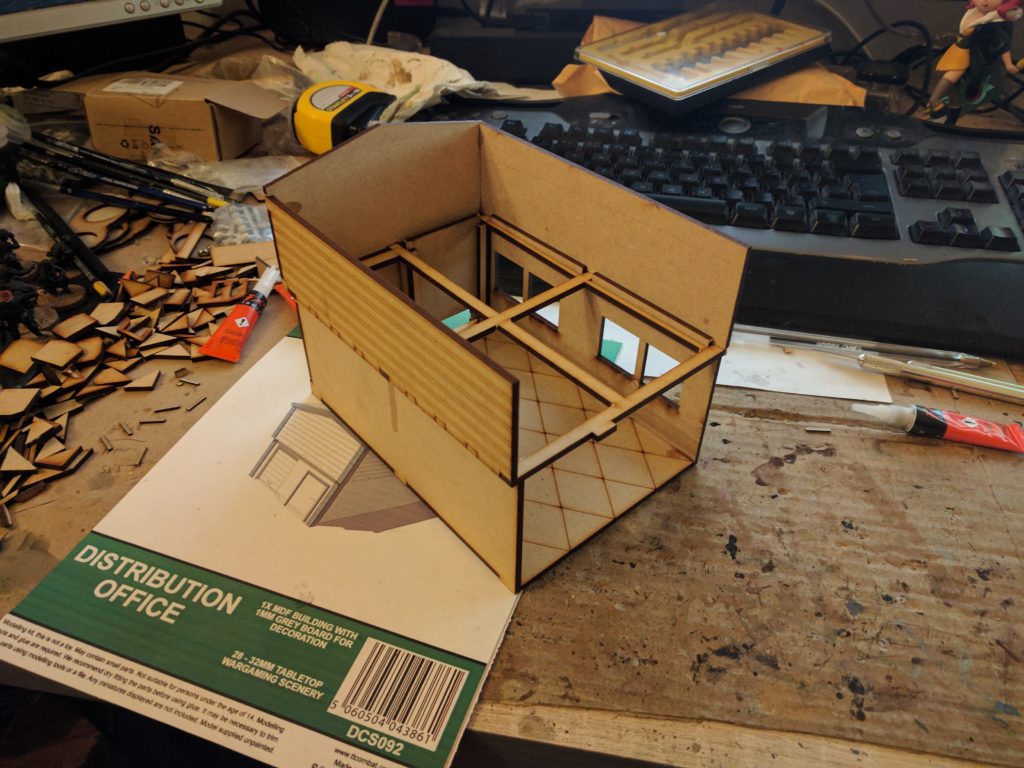
It’s a cool little building and I think any depot park without would be a bit lacking. It’s also a nice change of pace to build after the complexity of the rest of the depot.
If you assemble it without the back wall, and don’t install the light above the entrance to the depot, you can clip the office to the main depot. This lets you easily create a reception area (perfect if you’re trying to make a Royal Mail depot).
Final Thoughts
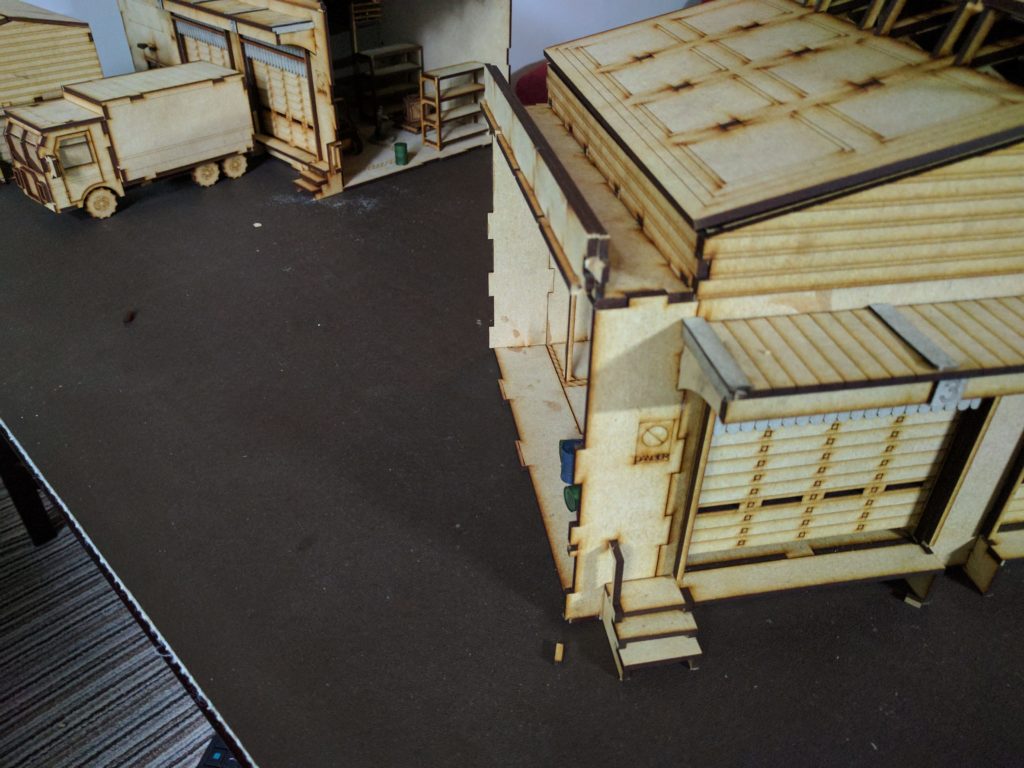
Overall, I’m very impressed with the range. Once fully assembled, it a true centrepiece, drawing the eye to it. With the roof on, it towers over the rest of the board. Remove the roof and you suddenly have a large interior space that can easily be filled with scatter terrain to form a complete battlezone.
It also seems a decent price. For all three kits, you’re looking at around £80. If you compare it to Sarissa’s factory (around £50), that £30 difference gets you a huge increase in playable area and a pile of scatter terrain. Of course, you could just combine them to build up an industrial park, all ready for your troops to fight through.
For as much as I like it, it would be cool to be able to have a bit more depth to it, letting you have a much larger warehouse to fight through. You could try to custom build it by sawing a hole through the back walls and adding an additional depot but it would require a fair amount of bodging to get it fully working.
If you’re wanting something to make you board stand out or have a certain desire to fight through parked HGVs and shelves full of crates, then this kit is for you. Of course, it does now mean I’m terrified to see what TTCombat is going to bring to Salute next year.
I hope you all enjoyed that as much as I enjoyed building it. Next weekend, keep your eyes open for a battle report showing some dodgy business going down at the depot…
STOP THE PRESS: Just as this goes to be posted, TTCombat have released a range of new sets to complement the depot, such as additional machinery and shelving units. Expect impressions in the future!