Earlier this year, I wrote a load of stuff covering Spectre’s first vehicle release for the technical. In it, I commented about miniguns which was a stretch goal from the Kickstarter that was sadly missed, as well as the illusive “Tactical Technical”. Well, it looks like it was merely being sneaky and it is now out as part of this latest release. And oh boy, is there a lot of cool stuff on this release.
Sadly, due to my desire to get the vehicles in a state where I can hot swap the various weapon systems and cargo, I don’t yet have them painted. However I can cover the initial impressions on every part of this release, detailing any issues I may have found during the initial build process and looking at what I like and don’t like. You’ll just have to wait to see the final product.
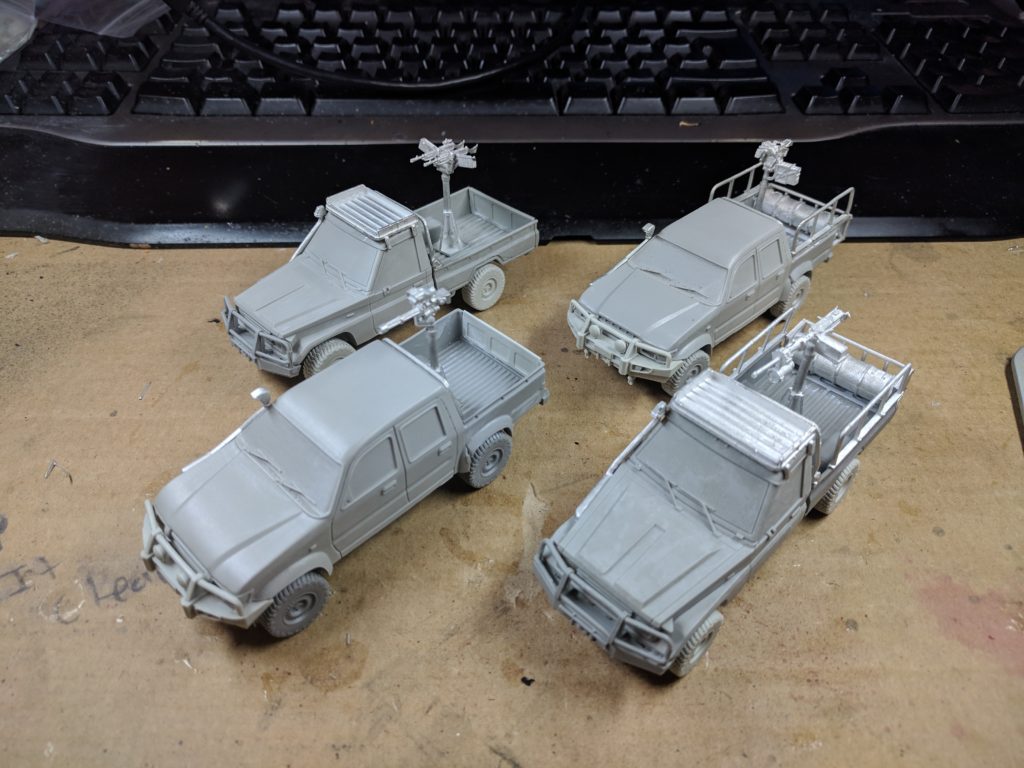
The Trucks
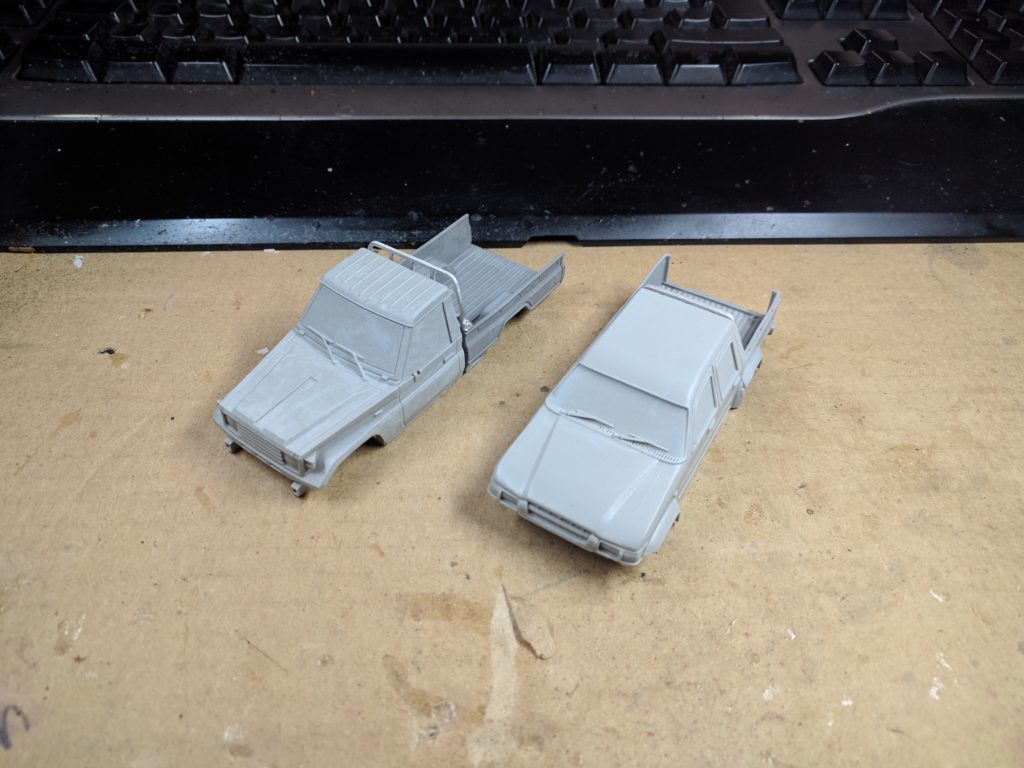
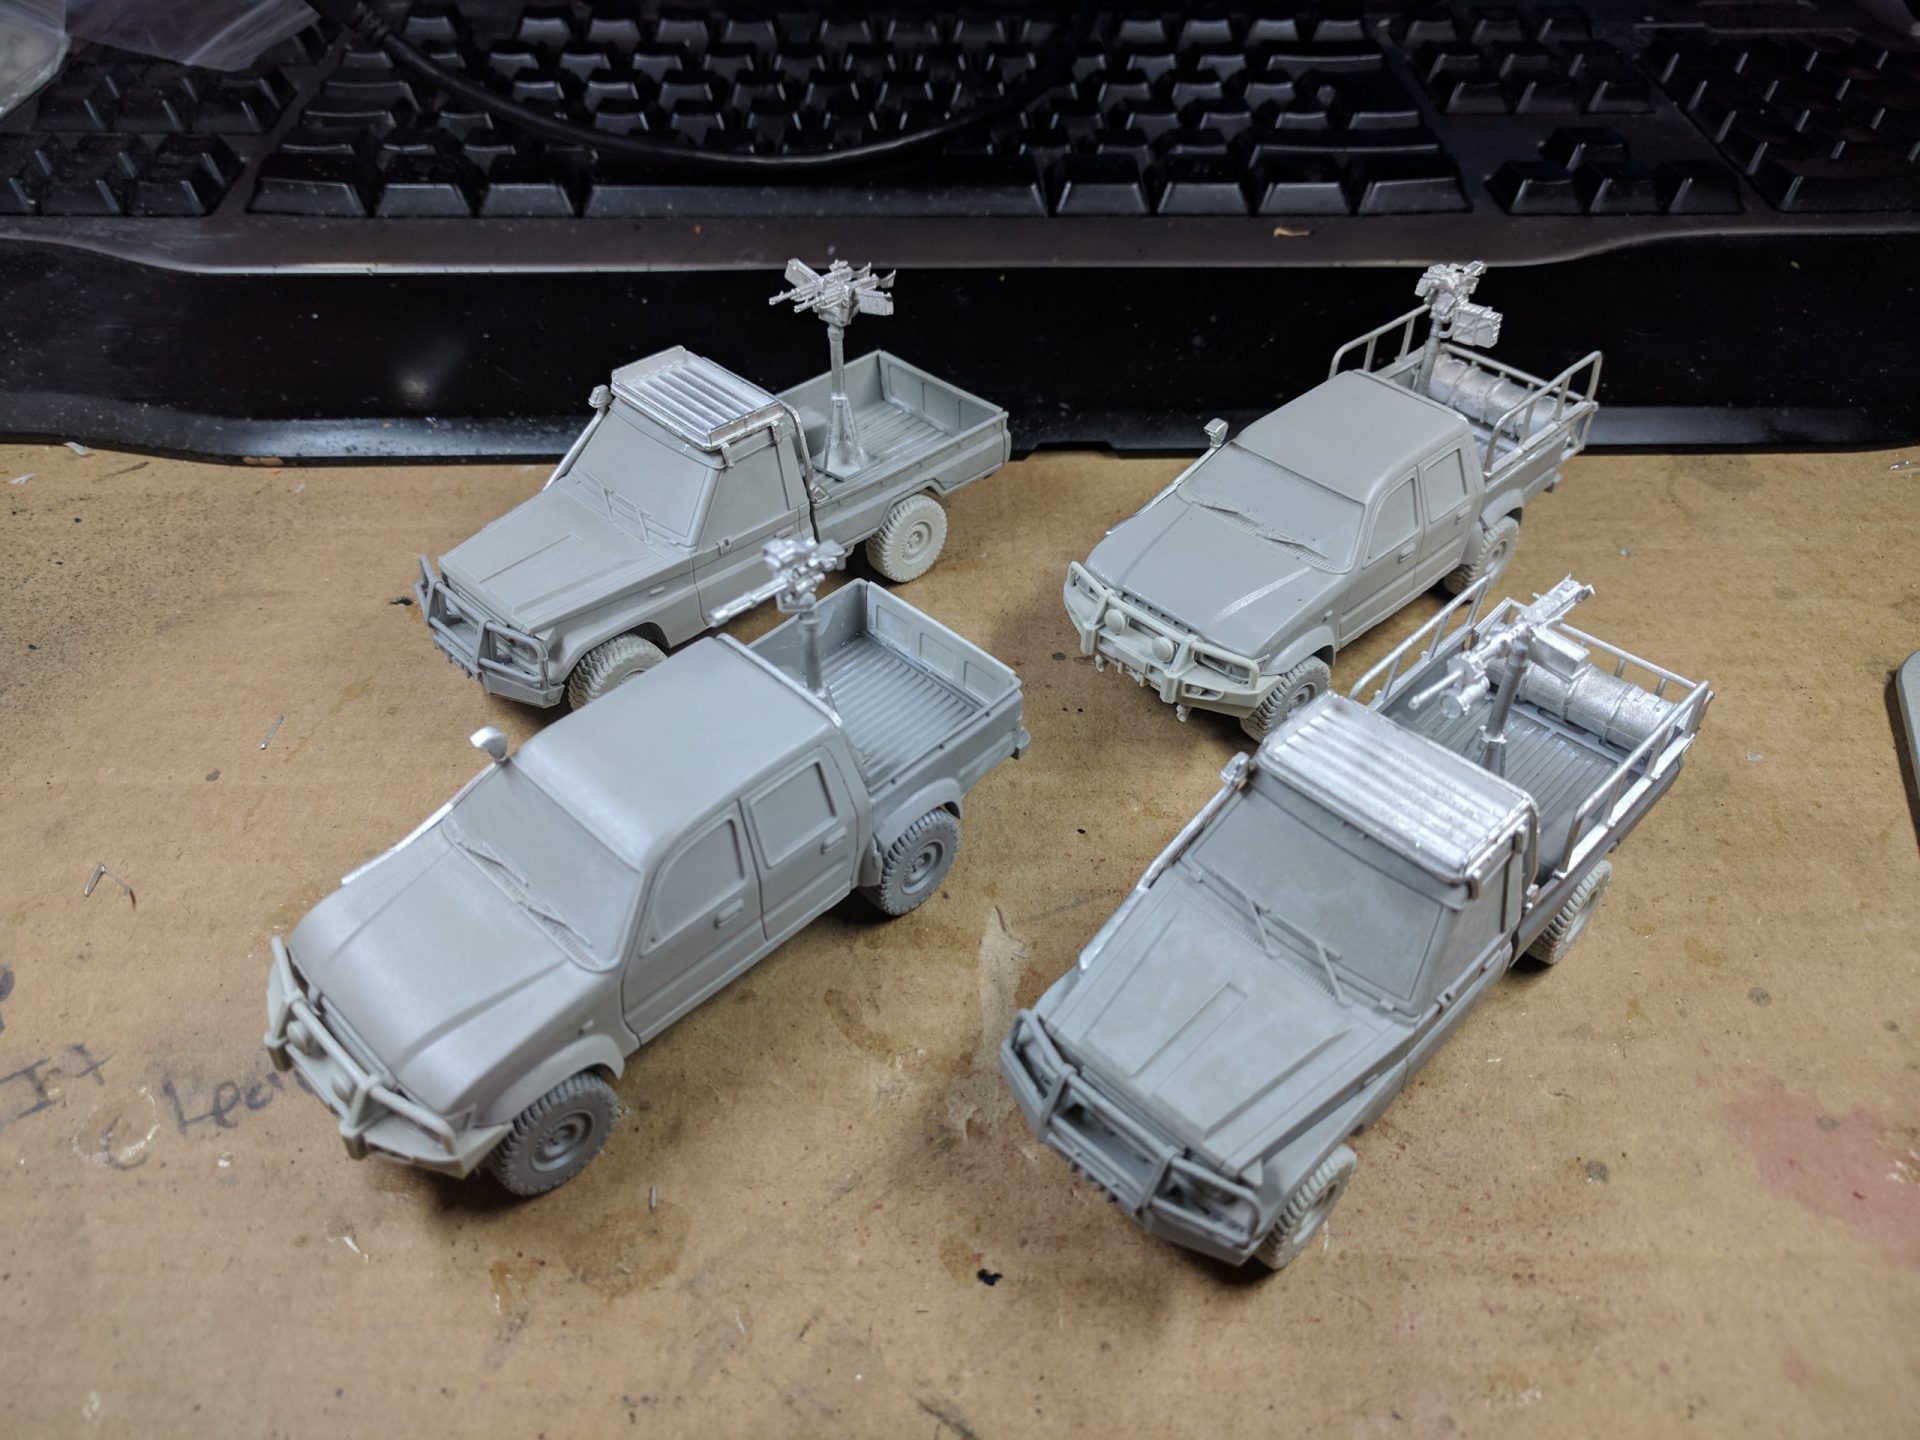
The vehicles that form the base for the SF Technicals range are the exact same ones released earlier in the year. Alpha provides a larger truck bed while Bravo is a more modern style but has a smaller cargo capacity. When building the kits for the SF vehicles, I assembled the two part chassis and then added the rack behind each cab. The remaining parts were left off to make assembling the upgrades much easier.
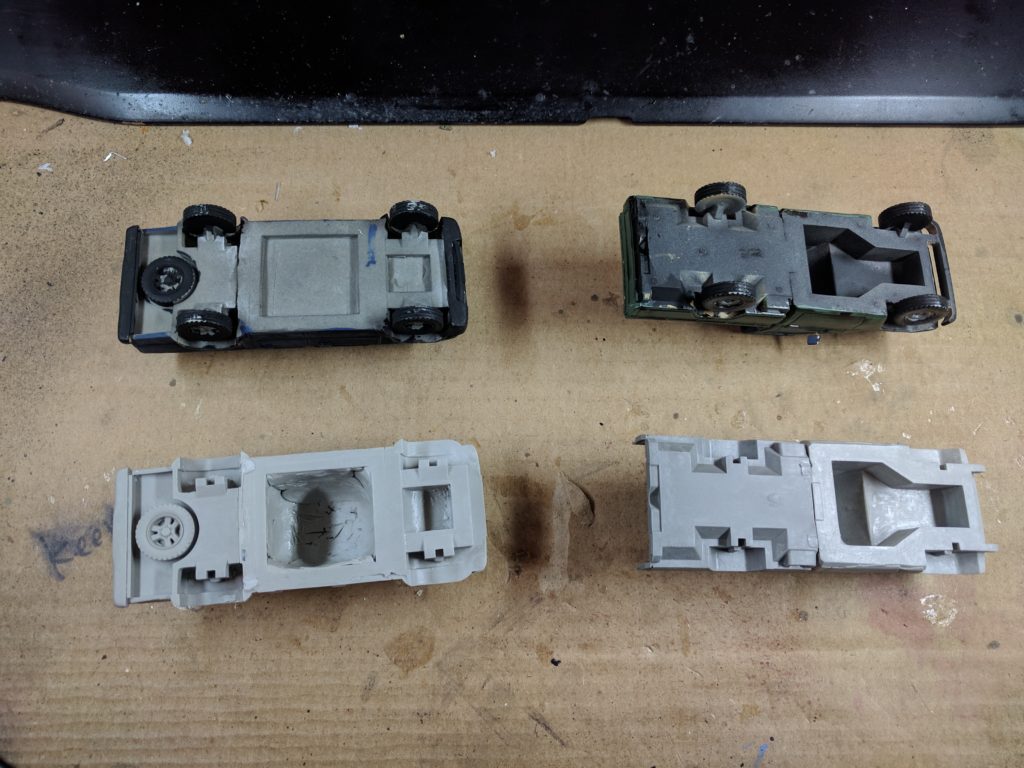
A few things have changed with the vehicles since the original release, presumably to ease production and save on material. Technical Bravo is comprised of much less material, with the cab now mostly empty space. The other thing I noticed was that some of the resin was slightly misaligned. This was quickly solved by a quick bath in hot water and some gentle bending.
The Upgrade Packs
The first part to look at when building your new technicals are the upgrade packs. These additions build off the pieces in the main kits and help to make them look more suited for off-road activities or military action.
Alpha
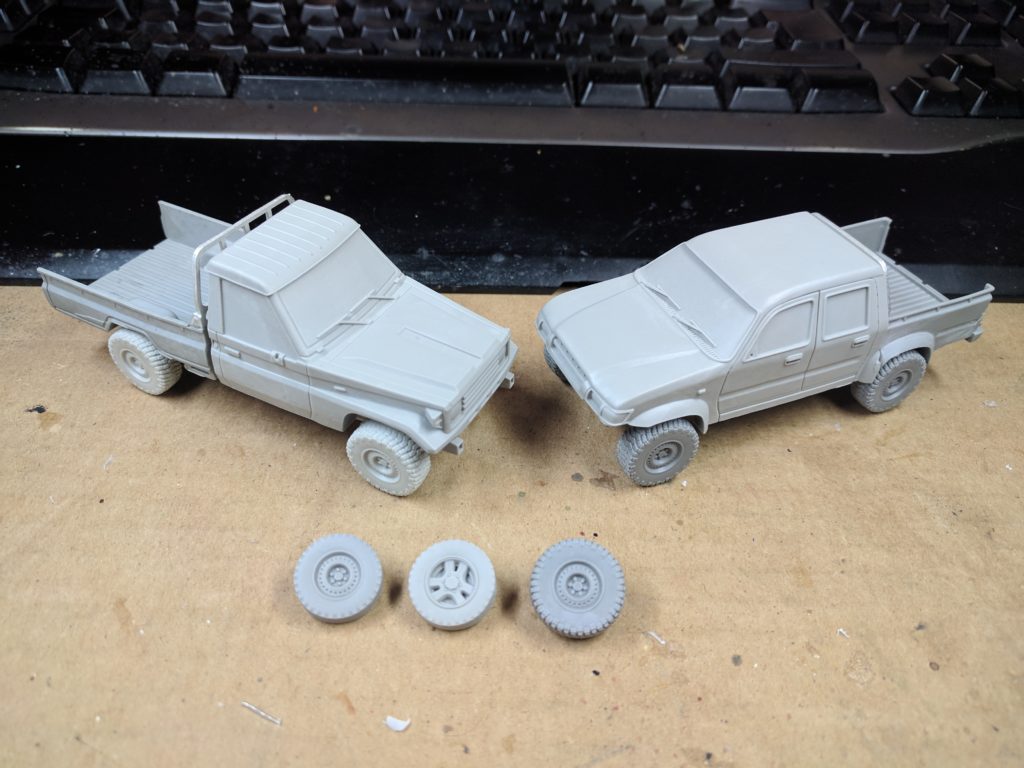
Alpha is perhaps the simplest of the upgrade packs. It’s a pack of wheels, sporting improved tyres. These are a good way of showing off upgrades (such as run-flats) or extending the stowage in a vehicle by covering it in spares. These wheels replace the ones from the vehicle packs and come with enough to fully outfit one vehicle and have two left over to mount as stowage or for a gunner to stand on. They are a little bigger than the default wheels so the finished vehicle will be slightly taller than normal.
Bravo
Bravo is designed to make your vehicles really stand out from the civilian pickups while also letting you really load it up with stowage. The pack is actually two sets of upgrades in one. The first is a long-range fuel tank. This is assembled around the rear door to the cargo bed. After placing the tank, a cage comprising of three parts is placed around it. The main thing when building it is to make sure the curved edges of the two side pieces clip onto the round sections of the back of the cage (it will make more sense when you are building them). Then simply glue the construction on the back of the cargo bed. If you don’t want the giant tank of flammable liquid behind your operators, the cage could be assembled to hold other stowage such as jerry cans or hard containers.
The other part of the upgrade are the racks that mount on the side of the cargo bed. These create the mounting points for all sorts of gear, from spare tires to sand guards. As well as hosting these bits of gear, the rails could also be used to support plasticard armoured panels if you feel the need to up the protection on your vehicle. I’d recommend putting the vertical part of the mounting area on the inside of the cargo bed (as you can see below) as it looks a little better
The rails mount on both types of chassis but are really designed for the Alpha technical. However, it does also work on the Bravo vehicle as you can see below. In this case, the side rails ended up connecting to the top of the cage around the fuel tank. This style does look similar to some troop carrying pickups you might see in places such as Mexico.
Charlie & Delta
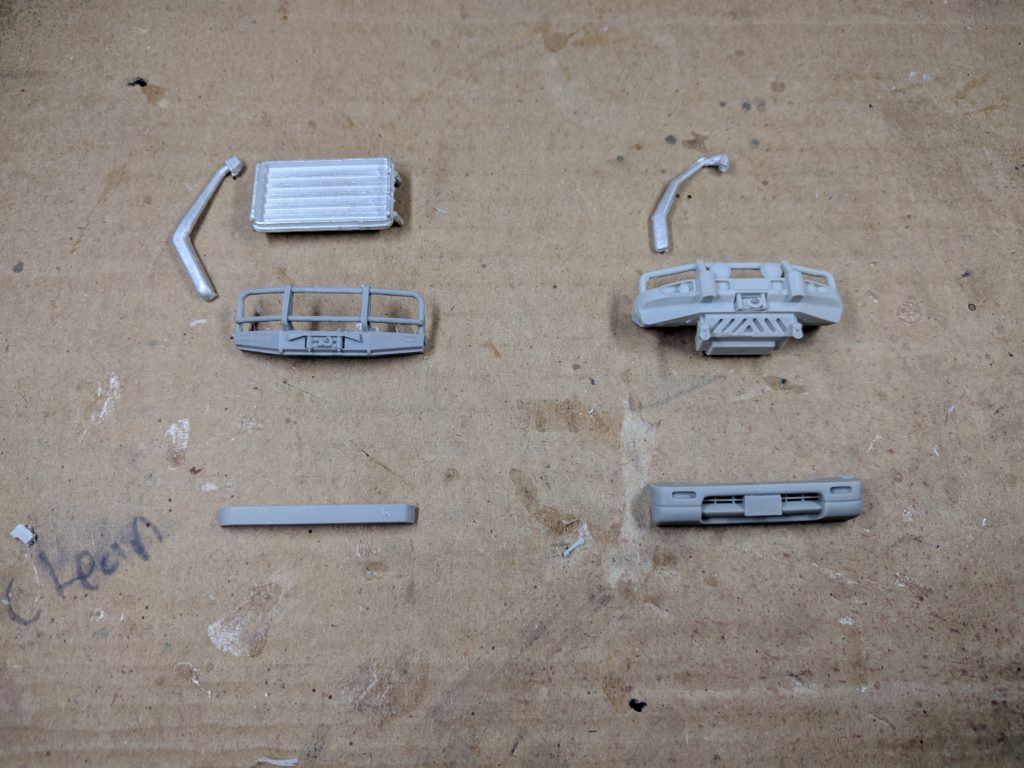
These two packs perform the same role – adding bullbars and a snorkel to both types of the base chassis. These upgrades really add to the off-road style on the vehicles, turning them from a street truck to something you would expect to see bounding through the desert.
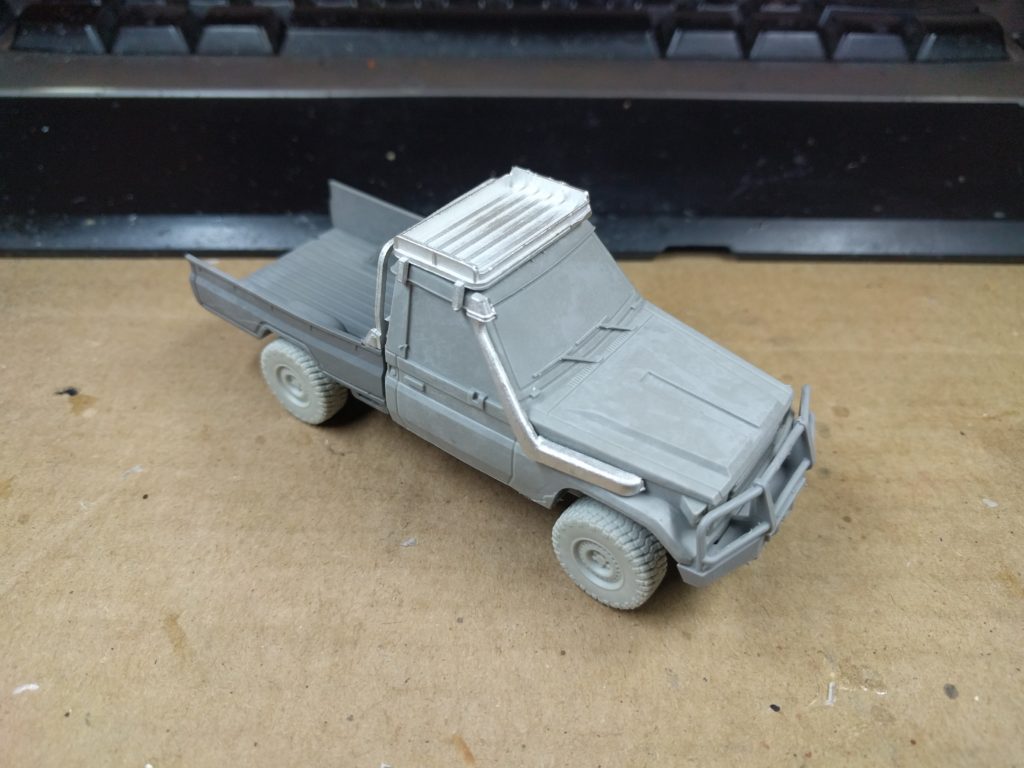
Charlie is for the Alpha technical. The pack includes a new bumper that features the bullbars, a snorkel and a rooftop storage rack. The bumper fits on really well and I think looks awesome. The snorkel has a notch in the side to help with alignment when placing it, something that is appreciated during construction. However, my favourite feature is the roof rack. It has a slight ramp on the mounting block so it sits flat on the sloped roof and it looks rad. Combined with the stowage pack, you can fill it with all sorts of hard cases, anti-tank weapons and gear (all the goodies a team of operators might need) while leaving most of the cargo bed free for weapon mountings.
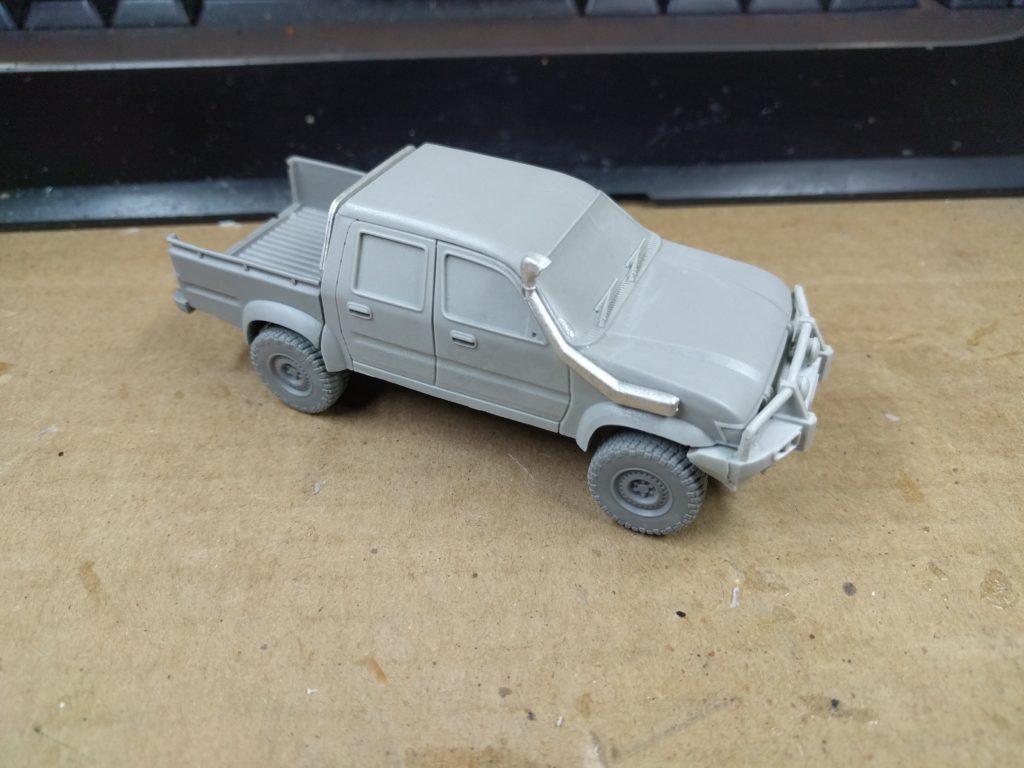
Delta is for the Bravo vehicle and contains a replacement lower front and the snorkel. It would have been cool if it came with a roof mounted storage rack to match the other pack of this type but it’s not a deal breaker. Again, the snorkel has a nice notch to help with placement and the resin front end only needed very minor cleanup.
Weapons
Of course, a major part of the latest release is giving you some SF suitable weapons for your new rides to roll around with. You could choose to mount the standard weapons (perhaps if your team is less well equipped) but honestly, there is a minigun option literally right there.
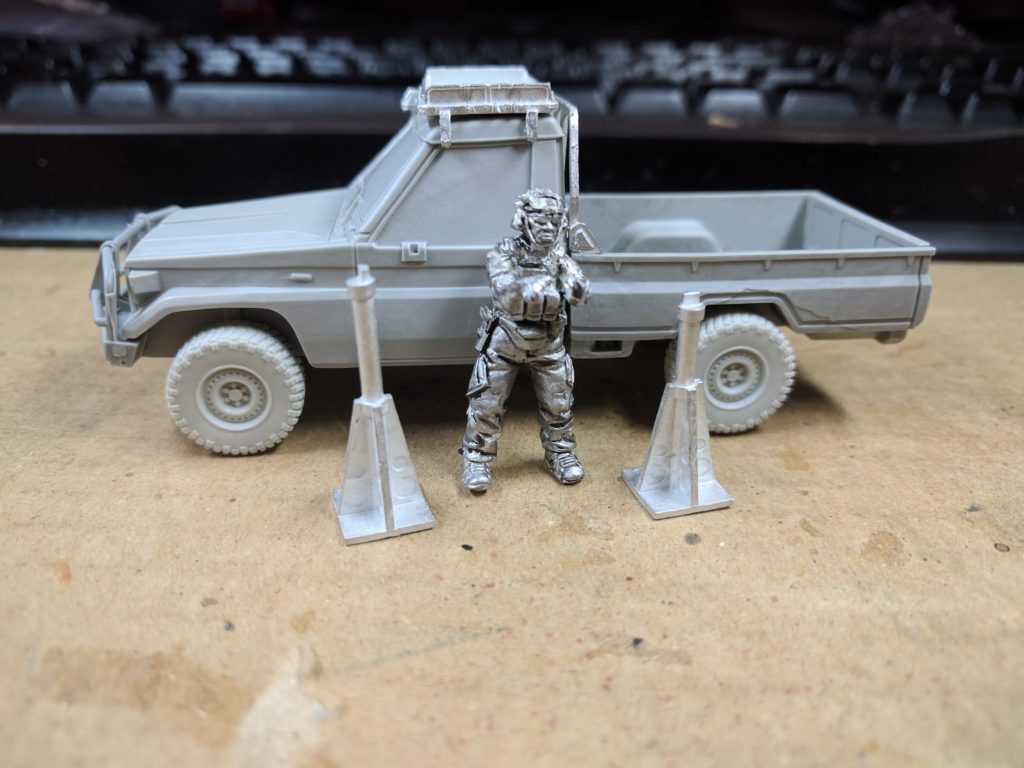
Crew
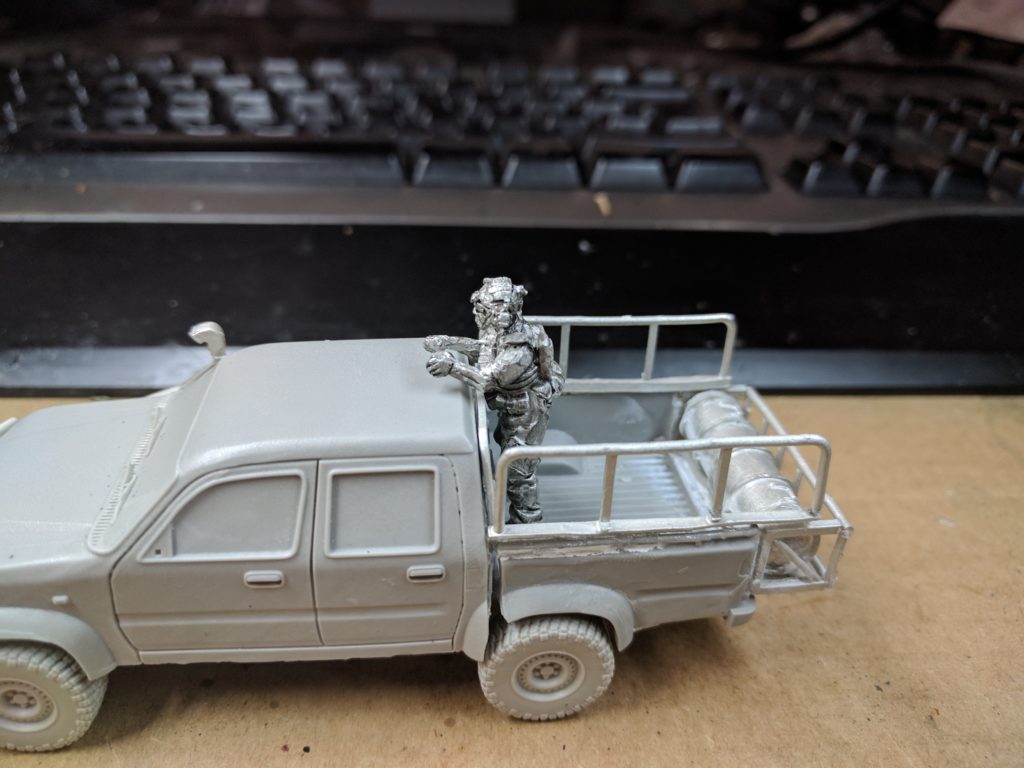
In every release from any wargames manufacturer, there is a slight disappointment and I think this time, the crew selection is the slight let down. When the first technicals came out there was a nice selection of generic crew standing next to the various weapons. For the HMG alone there were two options seemingly designed for it (one shooting and one leaning on the weapon spotting). For the SF release there is only one option – Crew Hotel, an operator in combat gear in the aiming pose. It’s a good basic option but having a second choice (perhaps a character pointing out a potential target or gesturing at some civilian trying to overtake) would be a useful addition. Even a simple head swap would have been nice. At the same time though, this is probably the most commonly used pose so in the end for many people it won’t matter.
One thing to note is that you will need to carefully bend the arms to line them up to the trigger locations. It requires just a little more force than you would think it would need but the metal Spectre uses is very good at being slightly manhandled.
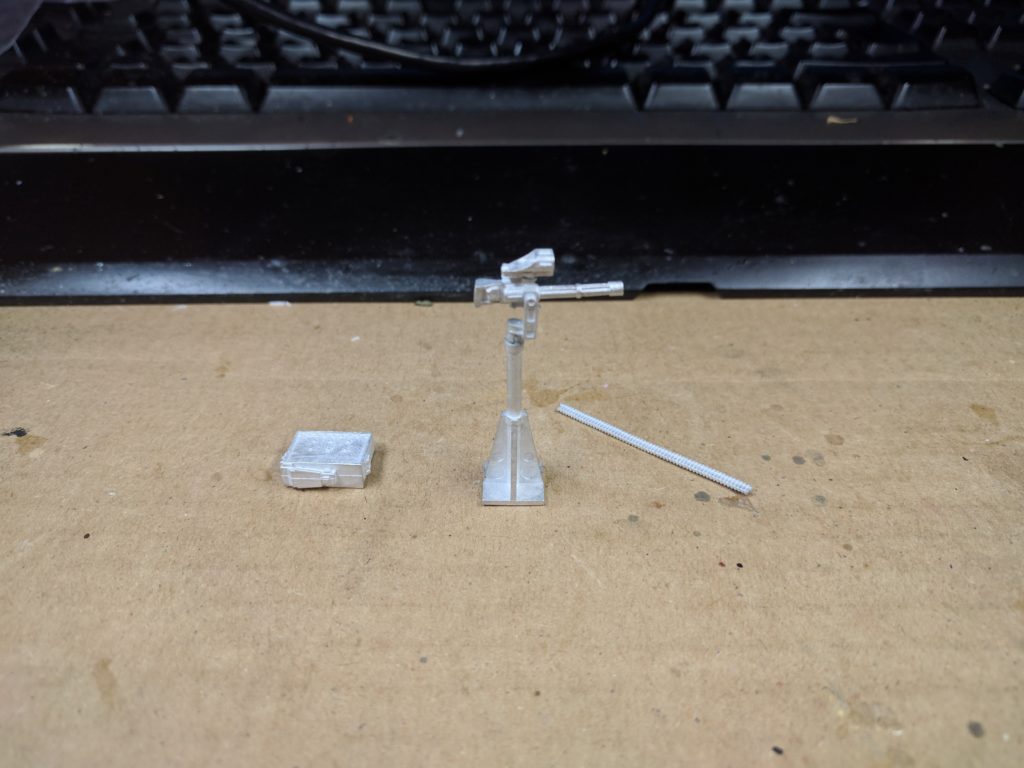
Common Elements
The new guns listed below share a common feature – the mount. Unlike the pole on the original M2, the new guns use a much more sturdy looking mount. It comes in two heights; the tall one clears the top of cab and allows for a forward fire arc while the other is better for rear or side firing guns. The top of each pole is split in half and matches up to the bottom of each of the weapon assemblies. This requires some patient holding while waiting the glue to dry but seems to work quite well.
No matter what height you choose, both mounts will require that a rear gunner stands on something in order to reach the spade grips. Having seen one of the Spectre models at Cardiff, it seems that a spare tyre is a good option.
M2 .50cal SF
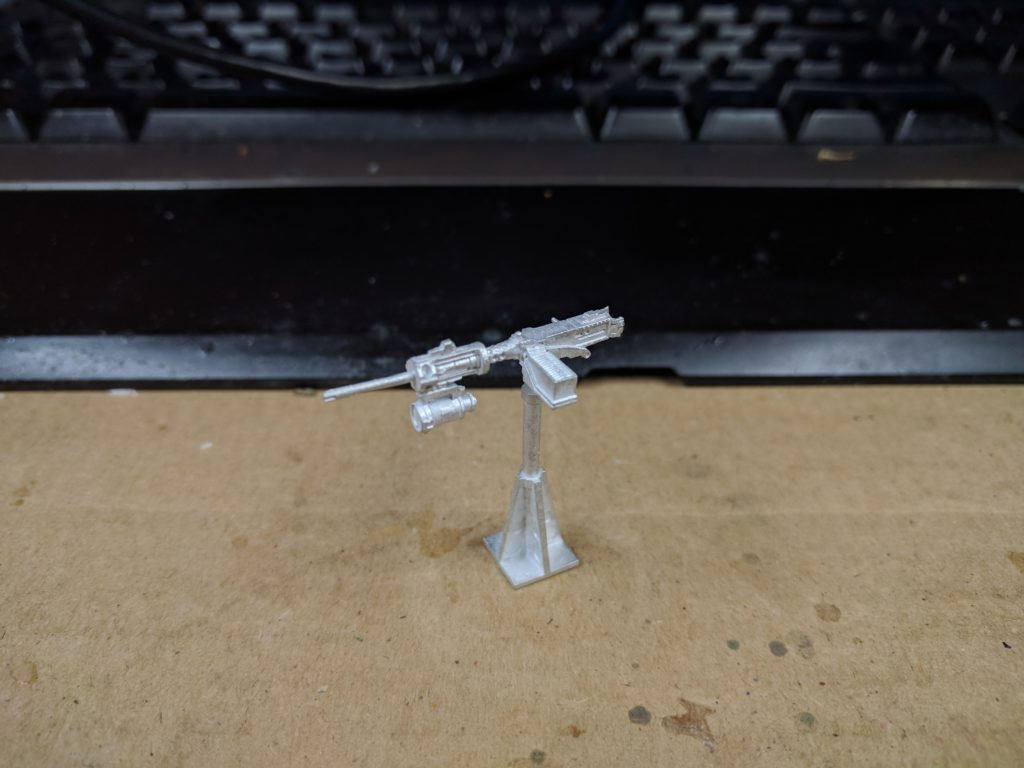
Yep, you can’t release a technical without a 50cal. This one however is rather special. Wrapping the barrel is rail system onto which two attachments have been mounted. On top of the gun is an Eotech style holographic sight (or red dot in Spectre Operations) while underneath is the giant Hellfire torch capable of illuminating targets much further than other light systems. Combined together, these provide a useful setup to pair with the HMG’s lethality and range on the tabletop, letting you engage targets accurately no matter what time of day it is.
Without a doubt this was the simplest weapon to assemble out of the group. The gun is one piece so all it required was gluing it to the mount and it was good to go.
Mk47 AGL
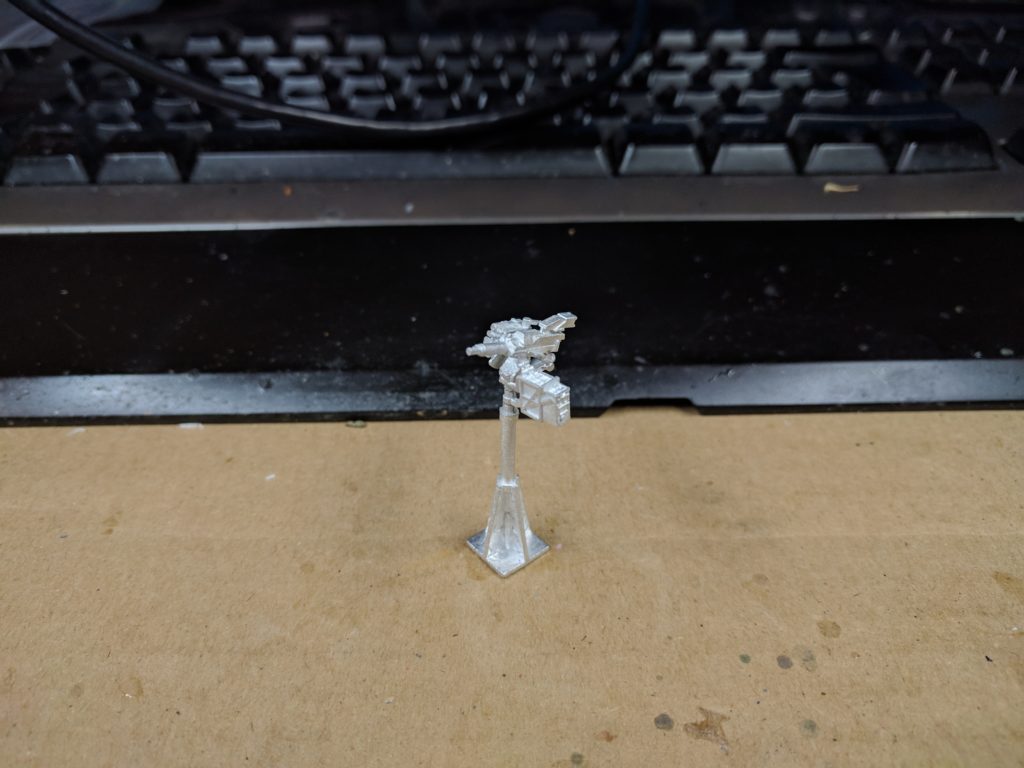
The only thing better than a 40mm grenade launcher is an automatic one complete with rangefinder. An upgrade over the old MK19, the MK47 AGL is the hottest new thing in automatic grenade launchers. With basic stats its great for suppressing large groups of unarmored enemies but the addition of an aiming system (run as either a scope, red dot, thermal sight or some combination of them) really helps to make it a precision area weapon. If you are feeling especially high-tech, the MK47 is capable of programming MK285 rounds to airburst over a target. So if you want to make an opponent cry, mention you want to use those rounds and start dropping grenades every turn that ignore cover saves thanks to the airburst rules.
The gun is made up of three parts – the barrel and main sight piece, the side mounted sight (including rails for other sights) and the stand/ammo box assembly. Glueing these three together required a few tweaks to get them lined up. By default, the launcher is slightly tilted upwards ready to lob rounds at the enemy downrange.
Dual M240
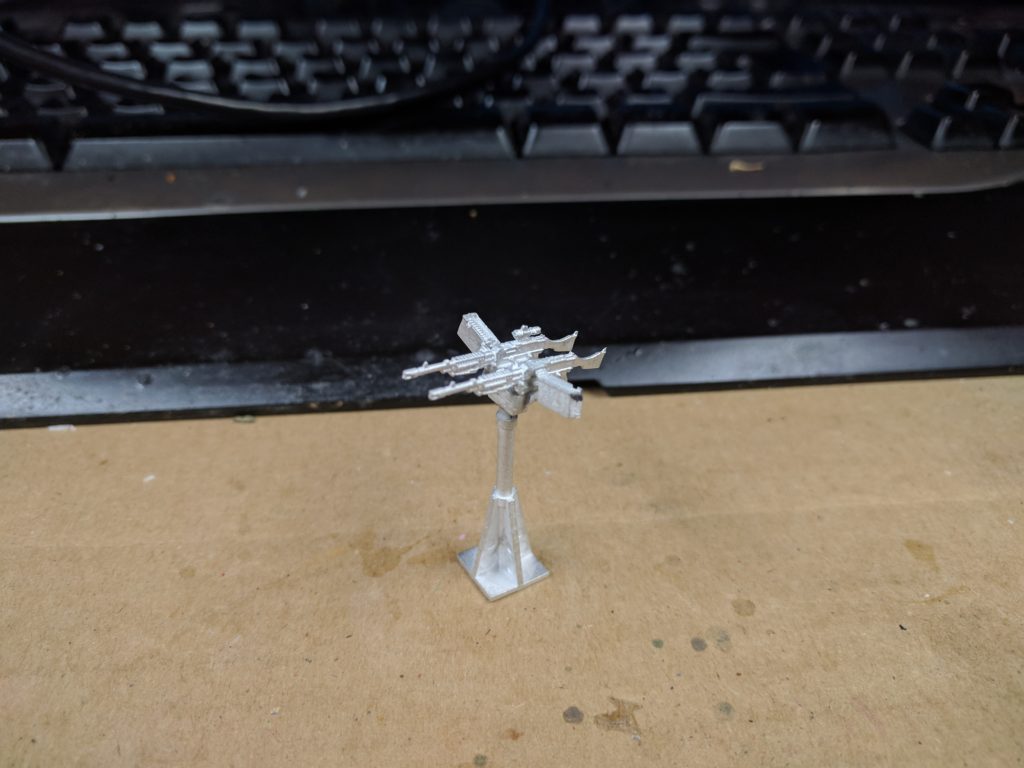
Why have only one medium machine gun when you can bolt two together, stick a sight on one and then add a chute for spent shell casings? Like the SAS jeeps from WW2, the simplest way to increase firepower on a mount is just to double what you have. The MMG is a good gun to begin with thanks to Sustained Fire and a 3+ lethality but turning it into a dual weapon means double the shots. Add to that a scope/red dot and you’ve got a great weapon for engaging infantry.
Building the gun was the most fiddly of them all, consisting of five parts. The two ammo boxes clip on the outer edges while the guns themselves fit into the slots in the lower mount. This mount then attaches to the tower using the usual method. As always, do a dry fitting run before getting the super glue out.
Now if only there was another way to get a ton of shots on targets…
M134 Minigun
Okay I’ll admit, this is something I’ve wanted since the kickstarter. Miniguns in all their forms are super cool and having one on the wargames table is just too tempting. Assembly is relatively simple despite the multiple parts. The gun sits in an arm that attaches to the column. As well as this, there is an optional red dot to mount on the rail on the top of the gun itself and two parts to form the ammo supply. The belt is the usual strip of metal that can be freely trimmed and twisted to line up with the large ammo box.
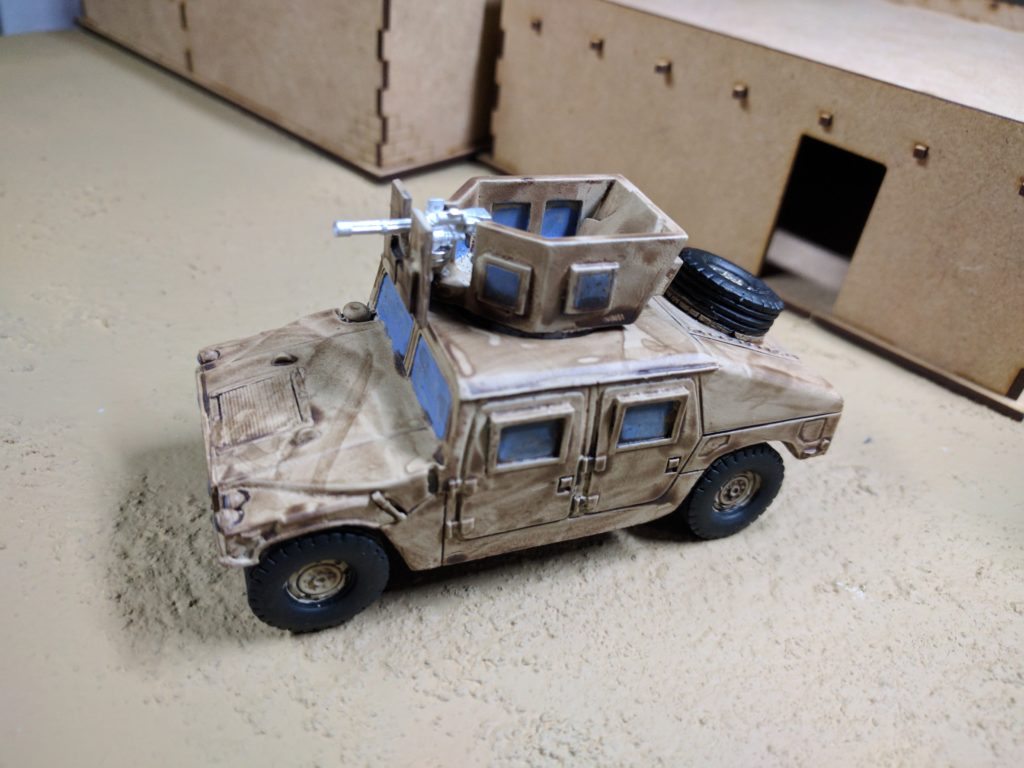
As an aside, one of my favourite things about the separate weapons that Spectre produces is the fact I can use them elsewhere. I have two Empress Humvee where I have replaced the gun mount with a magnet. Combined with Spectre’s stock of guns, this means I can swap out the standard M2 HMG for a DsHK (for when the Bazistan Army gets to use them) or, as you can see, for a Minigun. This versatility means you don’t have to buy 101 different vehicles for all the combination of weapons you might want, instead only needing as you might want to be on the tabletop. One thing with the Minigun, I had to trim some areas so it would fit properly on the magnet and trying to fit the ammo box in the turret is going to be hard.
In game, the minigun is a nightmare to go up against, no matter what the ruleset. Spectre Operations gives it 6 shots a turn that let you roll through a squad and easily put on the suppression. 3+ lethality and a decent range interval finish off a good package, espeically if you add a red dot.
Stowage
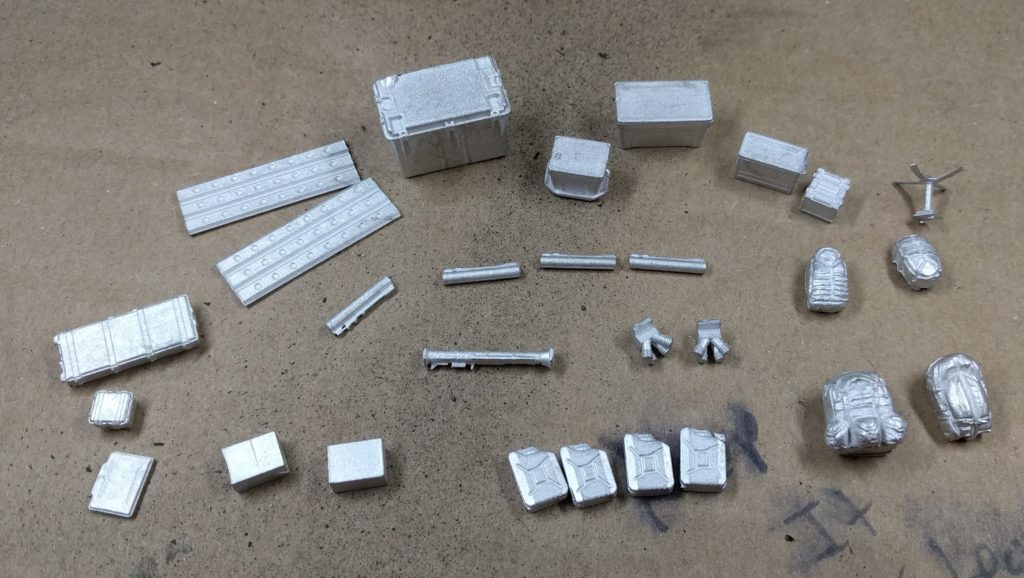
This release didn’t include any new stowage options (other than the new tires). However, last month we got Stowage Alfa which is packed full of stuff to cover your vehicle in. You could use the Razor stowage packs but they are not really designed for this style of vehicle.
If you want more details on Stowage Alfa, you can find my impressions here.
Final Thoughts
I ended my post on the initial Spectre Technical release by saying “The Spectre technicals are a great start to a new range. Apart from the minor issues, all the models are beautiful to behold and will be fantastic additions to anyone’s collection.”. It’s safe to say, the same idea carries on here.
With the second major release there are now a collection of parts that let you take that initial release and direct it to be more suitable for a different use. Although designed for Special Forces teams, the upgrades mean the vehicles can now be used for other groups (such as well-trained OPFOR, contractors or cartel members wanting a cool off-road vehicle) by simply varying many upgrades and how much stowage you add. There are a few tweaks I would make (more crew options, stowage racks for Technical Bravo) but these can be easily be added in future releases. For now though, all the new bits open up a world of exciting possibilities. I can’t wait to see the sheer variety of vehicles people come up with.
So now I’ve done the initial thoughts, it’s time for me to do the fun stuff and start finishing them. There will be a whole post on the process of getting the group of vehicles finished in the next few weeks. The main delay is setting up the series of plasticard bases that will let me swap guns and cargo sections between vehicle while hopefully looking better than the first version used for the militia. In addition, the militia equipment is being rebased and repainted after they got banged up during the trip to Cardiff. So keep your eye on the blog for more stuff on Spectre Miniatures releases and all things dedicated to ultramodern wargaming.